|
Adding the component to a Windows Forms project (.NET Frameworks from 2 to 4) |
  
|
|
Adding the component to a Windows Forms project (.NET Frameworks from 2 to 4) |
  
|
This component, requiring the availability of version 2.0 (or higher) of the .NET framework, is tested against Visual Studio versions starting from version 2005.
Here follows some topic of interest to help you using the product:
Editing control properties at Design-time
Editing control properties through the 3D Button Visual Editor application
Editing multiple controls at once
This product has been developed for use with Visual Studio (2005 or higher versions) so the availability of Visual Studio inside your system is a mandatory condition.
In order to install this product on your system, follow the steps listed below:
| • | Be sure to exit any application currently running on your system |
| • | Launch the downloaded 3dcm_f.exe (3dcm_t.exe for the trial version) file and follow the contained instructions. During the installation procedure, the setup program checks which versions of Visual Studio are currently installed inside the system in order to allow integrating the component with the corresponding toolbox of the IDE; each supported Visual Studio version has an associated checkbox (all unchecked by default) which allows determining if the component will be automatically added to the toolbox: |

Versions of Visual Studio supported by the component but not installed inside the system are rendered as grayed and disabled.
When versions 2005 and/or 2008 are chosen the installation procedure creates a tab named "MultiMedia Soft" inside the toolbox of the corresponding IDE; inside this tab the installed component will be visible as seen on the screenshot below:

When versions 2010 and/or higher are chosen the installation procedure creates two tabs inside the toolbox of the corresponding IDE, one for the component built against version 2.0 of the .NET framework (named "MultiMedia Soft for .NET FW 2") and one for the component built against version 4 of the .NET framework (named "MultiMedia Soft for .NET FW 4") as seen on the screenshot below (*):
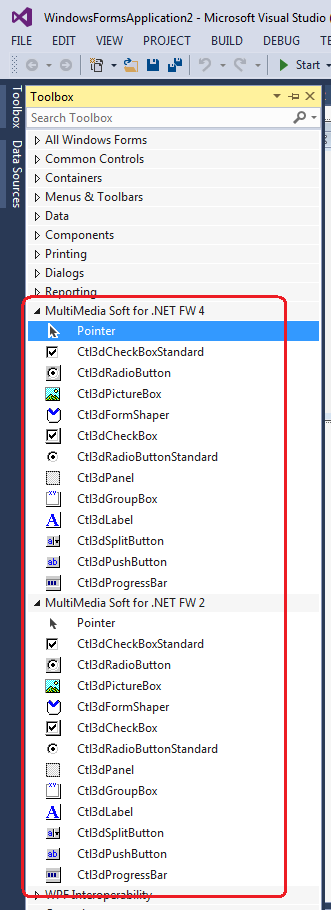
Components available inside the tab named "MultiMedia Soft for .NET FW 2" are intended for usage with container applications targeted for .NET framework 2.0, 3.0 or 3.5 while components available inside the tab named "MultiMedia Soft for .NET FW 4" are intended for usage with container applications targeted for .NET framework 4 or higher. (*)
In case you should have chosen to avoid the automatic installation of the component inside the toolbox, you could proceed with a manual installation using the procedure described below:
| • | Open the project you are working on |
| • | If not already visible, open the Toolbox of Visual Studio.NET |
| • | Right click the mouse button over the Toolbox surface. |
| • | Select the "Choose Items..." menu item; this will open the "Choose Toolbox items" dialog box. |
| • | Select the ".NET Framework components" tab |
| • | Scroll down the list of installed components and find the components you can partially see on the picture below, belonging to the Ctl3d namespace. |

| • | As you can see there are two versions of the components: the ones with assembly name "Ctl3dMagicF4" are intended for usage with container applications targeted for .NET framework 4 or higher while the ones with assembly name "Ctl3dMagic" are intended for usage with container applications targeted for .NET framework 2.0, 3.0 or 3.5 so you may decide which of the two version best fits your needs. |
| • | Select all of the needed check boxes (we suggest you to check each of the Ctl3d components now, so they will be already available for future developments). |
| • | Now the components will be available inside the Toolbox as displayed on the image below |

| • | Just in case you should have decided to add both versions of the component to the toolbox, they would appear with the same name: in order to distinguish between the one targeted for version 2 and the one targeted for version 4 of the .NET framework, just position the mouse over the icon so a tool tip containing the version of the component will appear; "Version 4.0.0.0" is the one targeted for version 4 of the .NET framework while "Version 2.0.0.0" is the one targeted for version 2 of the .NET framework (*). It's in any case recommended avoiding the usage of both versions of the component within the same application because it would not make sense and would raise dramatically the application's footprint. |

| • | Now you can select the component's icon inside the toolbox and drag it into the container form under editing; the component will appear with its default graphical settings and one reference to the component will be automatically added to the "References" section of the Project |

| • | You can now start developing your code around the component |
IMPORTANT NOTE ABOUT THE TARGETED .NET FRAMEWORK INSIDE VISUAL STUDIO 2010 When a new application is created from scratch through the Visual Studio 2010 wizard, by default the targeted .NET framework is set to ".NET framework 4 Client Profile": this version of the .NET framework is a subset of the .NET framework 4 and one of its main limitations is the fact that you cannot reference an assembly that is not in the ".NET Framework 4 Client Profile" so, in order to be able compiling the application referencing one of our components, assuming that the project name is "MyApp", you will have to perform following steps:
|
(*) Projects originally developed with versions of the components older than 3.3 always use Ctl3DMagic reference: if you want to develop an application that can run directly into a Windows system where versions 2.0, 3.0 or 3.5 are not installed (such as clean installations of Windows 8, Windows 10 and Windows 11), you should set your applications to use ".NET framework 4" (or higher) as target framework and you should replace the original reference to Ctl3DMagic with the newest Ctl3DMagicF4.
The tutorial How to port projects developed with versions older than 3.3 for compilation with .NET framework 4 explains how to perform the porting of your application's project to version 4 of the .NET framework.
The tutorial How to port projects developed with versions older than 3.3 for compilation with .NET 5 and higher versions explains how to perform the porting of your application's project to newer versions of .NET
Editing control properties at Design-time
We have implemented several ways to change the control settings at Design-time, so you will have the possibility to use the way that you consider more user friendly:
Through the classical VS.NET "Properties" panel:
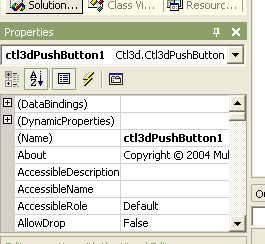
From this VS.NET panel you have access to all of the control available properties: simply scroll the left vertical scroll bar to reach the property you need to change.
As you will see, scrolling down the scrollbar you will find some property with a "+" sign on its left side: this means that this property contains a set of sub-properties: clicking the "+" sign will cause the property to be expanded giving you access to the sub-properties as in the example below:
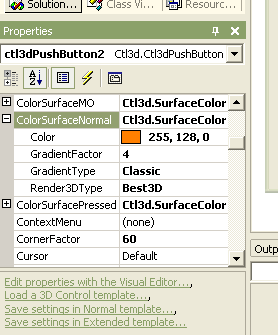
Due to the fact that the "Properties" box above is usually shrank on the left side of VS.NET to make room to your source code window, we have provided the possibility to access this property grid in a more comfortable way; simply click the control under editing using the right mouse button and select the "Properties..." item located on the bottom of the appearing context menu as in the image below:
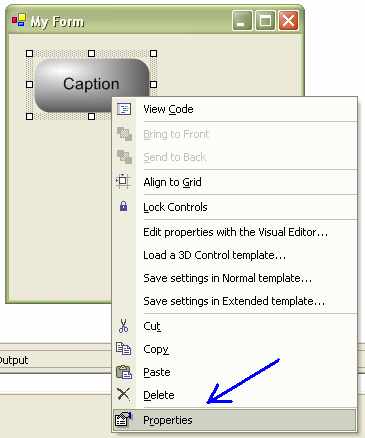
As you can see on the image below, the property editor will appear:
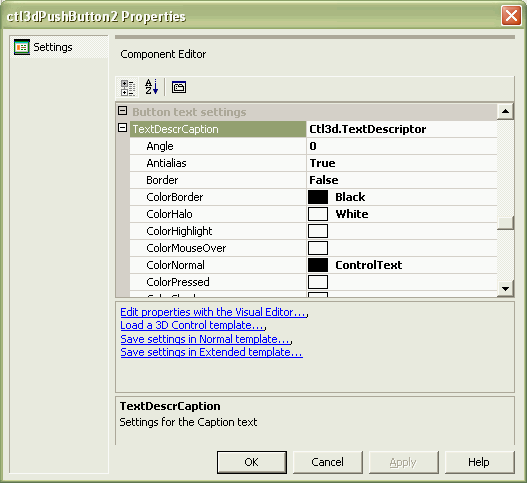
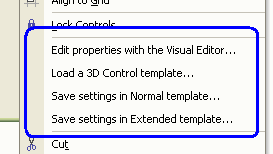
As you can see on the three images above, there are 4 links that will bring you to a few enhancements of the control editing; we have highlighted these links on the images below:
Inside the "Properties" panel:

Inside the context menu:
Inside the properties editor:
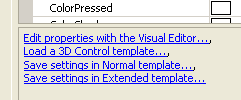
These links will give you the possibility to access some very important feature that will ease the control editing:
| • | Edit properties with the Visual Editor: see the paragraph below for details |
| • | Load a 3D Control template: this link will give you the possibility to browse a previously saved 3D template containing the settings to apply to the control; for details about the creation and use of 3D templates go to the How to manage 3D control templates section. |
| • | Save settings in Normal template: this link will give you the possibility to save the current control settings into a Normal 3D template file for future uses; for details about the creation and use of 3D templates go to the How to manage 3D control templates section. |
| • | Save settings in Extended template: this link will give you the possibility to save the current control settings into an Extended 3D template file for future uses; for details about the creation and use of 3D templates and for understanding the difference between Normal and Extended templates, go to the How to manage 3D control templates section. |
Editing control properties through the 3D Button Visual Editor application
Note: this feature is not available for the Ctl3dFormShaper control.
When editing a control at Design-time, you must take care of setting up the properties that will influence the control behaviour at Runtime in the various states the control could have: for example, our 3D buttons can change their surface color or the picture displayed on their surface when pressed or when the mouse is over the button area: usually, in order to see these effects, you will have to compile and run your projects in order to see if the settings made at Design-time are correct for your needs: with our component we have found the right solution to let you see, at Design-time, the behaviour the control will have at Runtime: the solution is the integration of this component with our 3D Button Visual Editor application.
3D Button Visual Editor is a WYSIWYG application we have developed for creating 3D buttons pictures: as you can see on the image below, its user interface is very friendly and doesn't require any particular skill: clicking the button under editing will show how the control will behave at runtime and, in the same way, if you have setup some "mouse over" behaviour, also know as "Rollover", for example a surface color change, you will have the possibility to test it by simply entering the mouse cursor over the button surface.
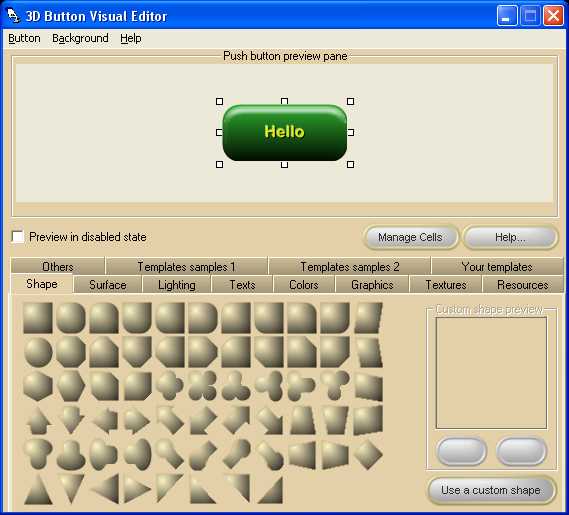
After having edited the button with your preferred settings, you can save or discard the new button's settings closing the application.
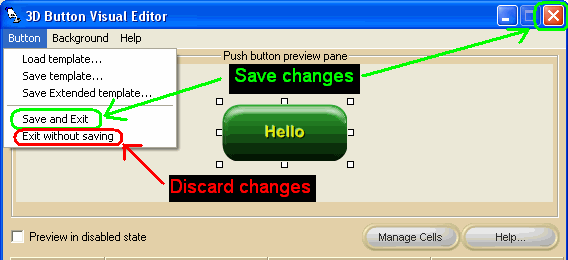
As you can see on the image above, also from inside 3D Button Visual Editor you can load and save 3D control templates.
Editing multiple controls at once
An application User Interface very often requires several buttons to have the same 3D settings, just see the image below displaying a virtual telephone keypad originally designed using the default settings of our Ctl3dPushButton:
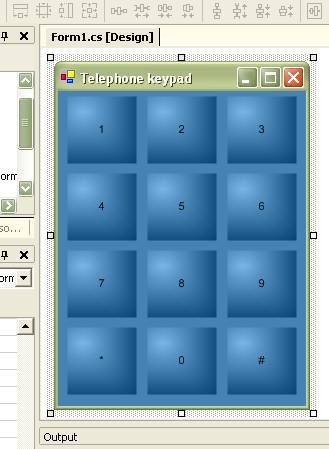
now we want to change the 3D buttons appearance in order to give them an outstanding look but we don't want to edit the same settings for each of them because it would require too much time we could use for more productive tasks; to save your time, follow the steps below:
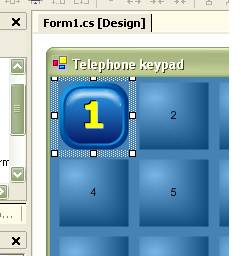
| • | Select button with caption "1" and edit its settings using the Visual Editor: the result could be like in the image below: |
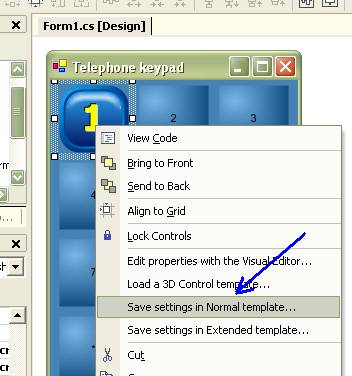
| • | Now we must apply the setting used for button "1" to all of the other buttons: click with the right mouse button the edited control and, from the context menu, select the "Save settings in Normal template..." item as displayed below: |
| • | Browse a directory in which you can store the 3D control template and assign it a name, then save it. |
| • | Select all the remaining buttons as displayed below (you can select more than one button clicking on each button surface while holding the CTRL key pressed); be sure that the container form is not selected together with the buttons. |
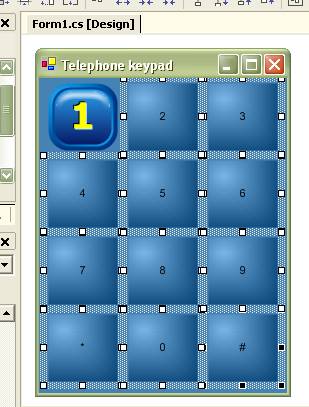
| • | Now go to the "Properties" pane and search the property named LoadTemplateFile as displayed below: |
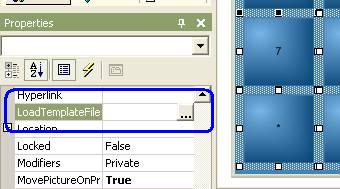
| • | Inside this property you can manually enter the previously saved 3D template file or, for your convenience, you can browse it clicking the |
| • | Once the 3D template will be selected the form will appear like this: |
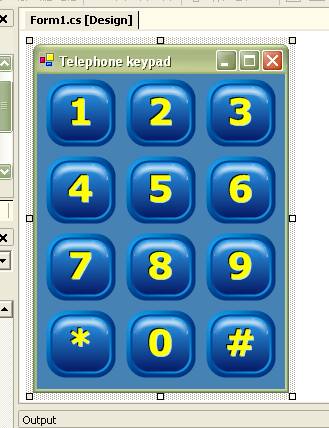
| • | That's all: at this point there are a couple of things to remark: |
The loading of the 3D template will not affect the caption text of the buttons but only its settings.
If all of these buttons will have the same size, the caching system will speed up the form rendering at Runtime: for further details about the caching system implemented inside our control, take a look to the How to speed up buttons rendering section.