|
Adding the component to a Windows Forms project (.NET 5, 6 and Core 3.1) |
  
|
|
Adding the component to a Windows Forms project (.NET 5, 6 and Core 3.1) |
  
|
Here follows some topic of interest to help you using the component:
Editing control properties at Design-time
After having installed the component inside the development PC through our setup program, you can add the component to a project targeting .NET 5, 6 and Core 3.1 versions by installing the proper NuGet package using the procedure described below:
| • | Open the project you are working on |
| • | Inside the "Solution Explorer" right-click the mouse button on the "Dependencies" item |
| • | From the context menu open the NuGet Package Manager by selecting the "Manage NuGet Packages ..." item |
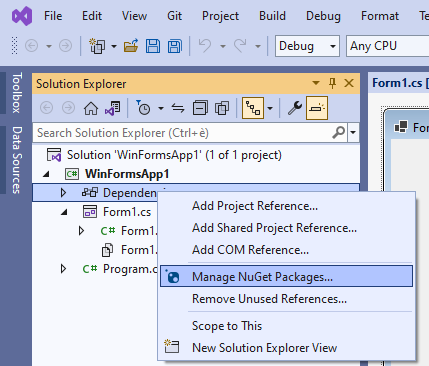
| • | By default the NuGet Package Manager will browse packages available on the nuget.org server; although trial versions of our NuGet packages are available inside nuget.org, it's recommended using packages available inside the folder in which you installed any of our components: the default folder is "\Program Files\MultiMedia Soft" so you need to set the mentioned folder as a packages source through the NuGet Package Manager settings |
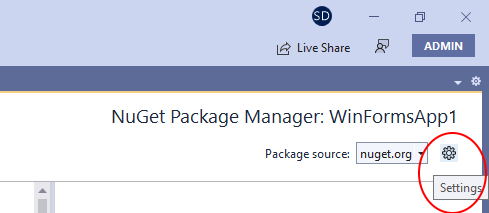
| • | On the settings form, select the "+" icon |
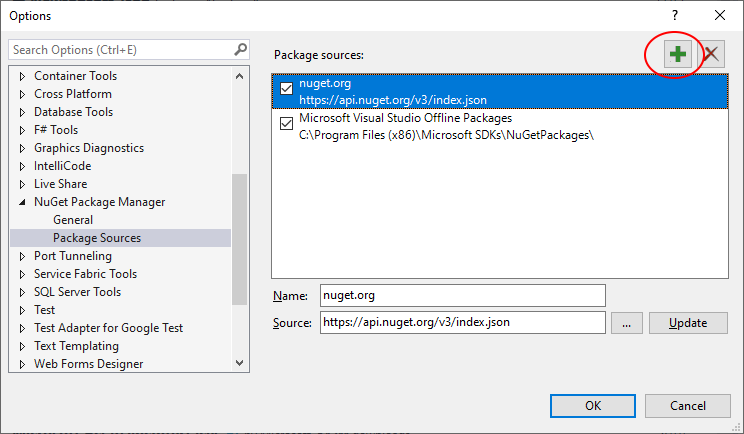
| • | A new default "Package source" is a automatically added as seen below |

| • | On the "Name" field enter a string that would help identifying the source (we suggest entering "MultiMedia Soft Packages") |
| • | Click the "..." button and enter the path where our NuGet packages are installed (by default it should be "\Program Files\MultiMedia Soft\NugetPacks") |
| • | By clicking the "Update" button the form should finally look like this: |

| • | Close the form by pressing the "OK" button |
| • | The new source could now be selected through the provided combo-box |
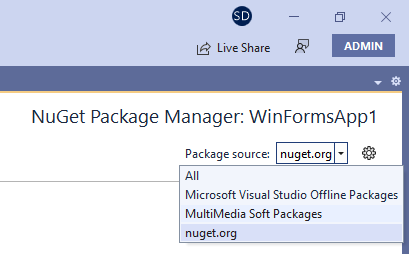
| • | Once selected, after clicking the "Browse" tab, all of the MultiMedia Soft NuGet packages installed on the development machine will be displayed (in this case a Trial version of the component) |
| • | In order to install the package inside the project, move the mouse of the right of the displayed version (circled in red below): this will cause an arrow to appear (circled in purple below): |

| • | Click the arrow in order to start the installation procedure |
| • | Once the installation procedure is completed, close the NuGet package manager |
| • | Open the form that will contain the component |
| • | Open the "Toolbox" and drag the AudioWaveformAnalyzer component into the container form: this will display the component's window where the user interface of the waveform analyzer will be rendered |
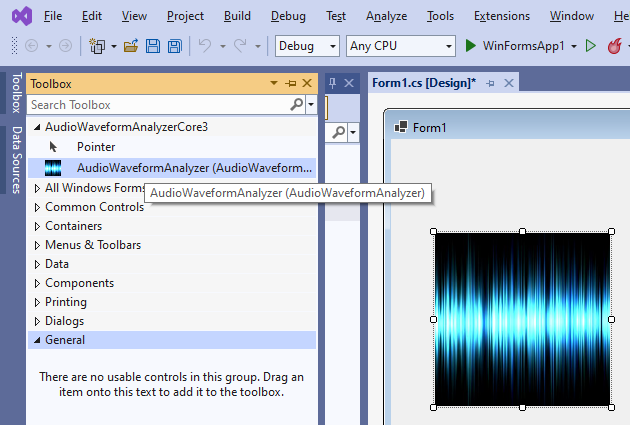
| • | At this point the component is installed and you can start adding the needed code |
The tutorial above is mostly related to the installation of the Trial version of the component; in case you should have already begun developing your application with the Trial version and at a certain extent you should decide to purchase the "Full" version, you would not have to restart your coding from scratch and you could simply upgrade using the appropriate NuGet package; below a simple sequence to perform this upgrade:
| • | Close any instance of Visual Studio |
| • | Uninstall the setup package of the Trial version from the "Apps" applet of the Windows settings |
| • | Download and install the Full version from our website using provided URL and credentials |
| • | Launch Visual Studio and open the project you were working on |
| • | Be sure to close the form containing the component |
| • | Inside the "Solution Explorer" expand the "Dependencies/Packages" item |
| • | Right click the "AudioWaveformAnalyzer.Trial" item and select the "Remove" menu item as seen below: |
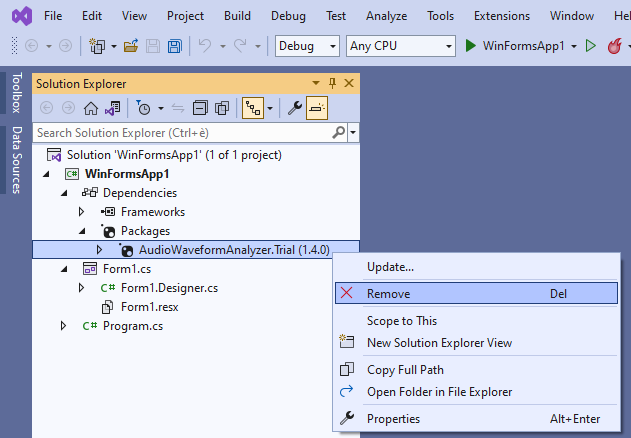
| • | As explained above for the Trial version, open again the NuGet Package Manager and select the "MultiMedia Soft packages" source |
| • | Press the arrow for installing the Full version and finally close the NuGet Package Manager |

| • | The upgrade is now completed so you can go on with your development. |
Editing control properties at Design-time
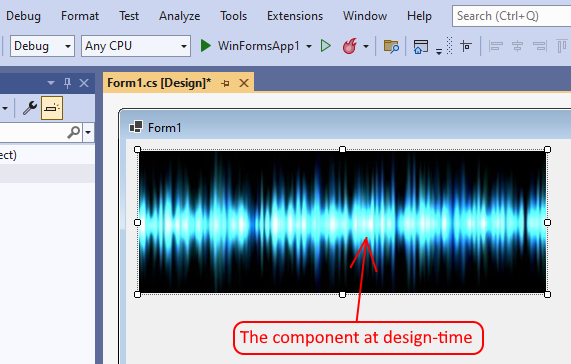
Once inserted, at design-time the control will appear in its default state.
Versions of the .NET Framework from 2 to 4 allow various ways to edit a component at design-time: unfortunately most of these ways (described inside the previous tutorial Adding the component to a Windows Forms project (.NET Frameworks from 2 to 4, like adding verbs to the context menu or adding links inside the properties panel, are no more available for .NET 5 and newer version.
Obviously you can still change properties using the the classical VS.NET "Properties" panel:

From this VS.NET panel you have access to all of the control available properties: simply scroll the left vertical scroll bar to reach the property you need to change.
As mentioned on a previous paragraph, with .NET 5 and newer versions available editing features of components at design time are quite limited so we had to find a sort of bridge for allowing the possibility to integrate the Waveform Analyzer Visual Editor application within Visual Studio. In order to launch this application you must locate the AccessVisualEditor property inside the "Properties" window and change its value from "False" to "True":

this launches the Waveform Analyzer Visual Editor application that allows changing most of the waveform analyzer settings and check how it would behave at runtime during an eventual playback session:

For details about the usage of the Waveform Analyzer Visual Editor application, see the "How to configure the waveform analyzer through the visual editor" tutorial.
Once the component has been added at design-time, you can start adding your own code around it: see the How to add code around the component tutorial for details.