|
Adding the component to a Windows Forms project (.NET Frameworks from 2 to 4) |
  
|
|
Adding the component to a Windows Forms project (.NET Frameworks from 2 to 4) |
  
|
This component, requiring the availability of version 2.0 (or higher) of the .NET framework, is tested against Visual Studio versions starting from version 2005.
Here follows some topic of interest to help you using the component:
Editing control properties at Design-time
During the installation procedure, the setup program checks which versions of Visual Studio are currently installed inside the system in order to allow integrating the component with the corresponding toolbox of the IDE; each supported Visual Studio version has an associated checkbox (all unchecked by default) which allows determining if the component will be automatically added to the toolbox:
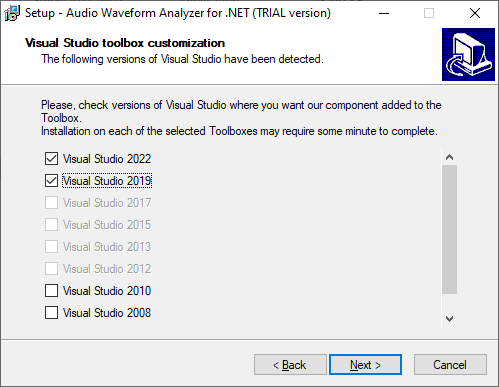
Versions of Visual Studio supported by the component but not installed inside the system are rendered as grayed and disabled.
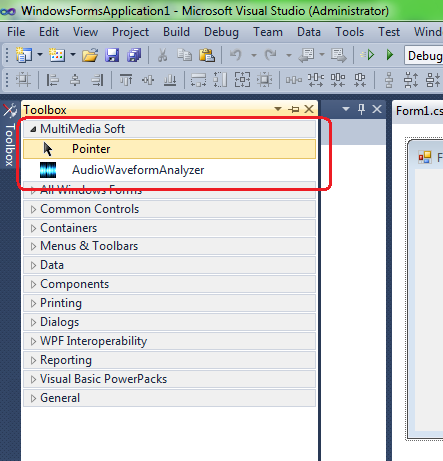
When versions 2005 and/or 2008 are chosen the installation procedure creates a tab named "MultiMedia Soft" inside the toolbox of the corresponding IDE; inside this tab the installed component will be visible as seen on the screenshot below:
When versions 2010 and/or higher are chosen the installation procedure creates two tabs inside the toolbox of the corresponding IDE, one for the component built against version 2.0 of the .NET framework (named "MultiMedia Soft for .NET FW 2") and one for the component built against version 4 of the .NET framework (named "MultiMedia Soft for .NET FW 4") as seen on the screenshot below:
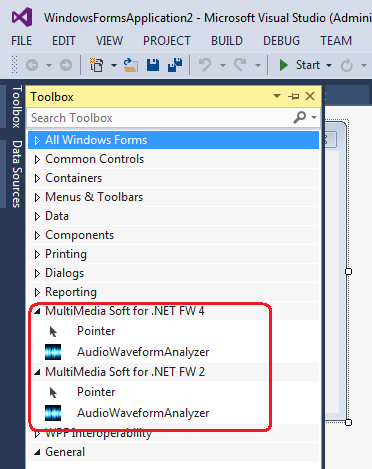
Components available inside the tab named "MultiMedia Soft for .NET FW 2" are intended for usage with container applications targeted for .NET framework 2.0, 3.0 or 3.5 while components available inside the tab named "MultiMedia Soft for .NET FW 4" are intended for usage with container applications targeted for .NET framework 4 or higher.
In case you should have chosen to avoid the automatic installation of the component inside the toolbox, you could proceed with a manual installation using the procedure described below:
| • | Open the project you are working on |
| • | If not already visible, open the Toolbox of Visual Studio |
| • | Right click the mouse button over the Toolbox surface. |
| • | Select the "Choose Items..." menu item; this will open the "Choose Toolbox items" dialog box. |
| • | Select the ".NET Framework components" tab |
| • | Between the installed components find the component named "AudioWaveformAnalyzer" as displayed below |
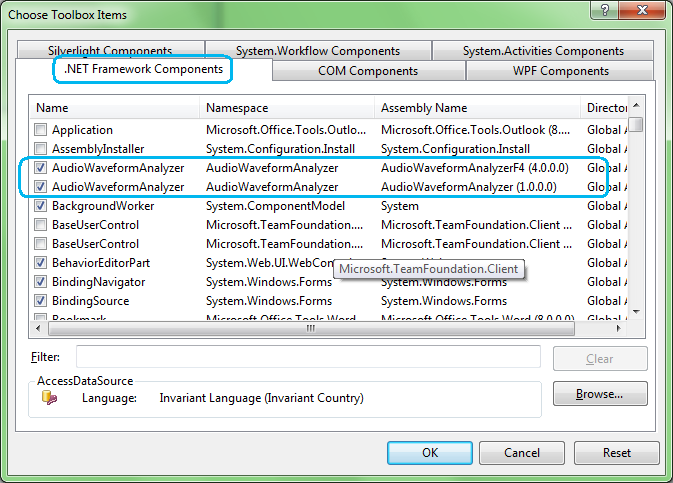
| • | As you can see there are two versions of the component: the one with assembly name "AudioWaveformAnalyzerF4" is intended for usage with container applications targeted for .NET framework 4 or higher while the one with assembly name "AudioWaveformAnalyzer" is intended for usage with container applications targeted for .NET framework 2.0, 3.0 or 3.5 so you may decide which of the two version best fits your needs. |
| • | Pressing the "OK" button will bring you again to your project working area and the icon below will appear inside your toolbox |
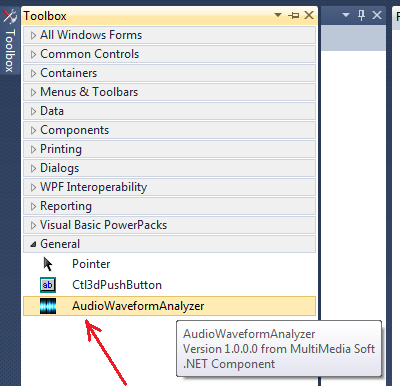
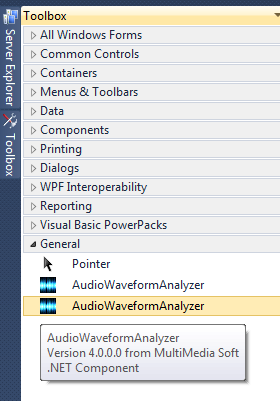
| • | Just in case you should have decided to add both versions of the component to the toolbox, they would appear with the same name: in order to distinguish between the one targeted for version 2 and the one targeted for version 4 of the .NET framework, just position the mouse over the icon so a tool tip containing the version of the component will appear; "Version 4.0.0.0" is the one targeted for version 4 of the .NET framework while "Version 1.0.0.0" is the one targeted for version 2 of the .NET framework. |
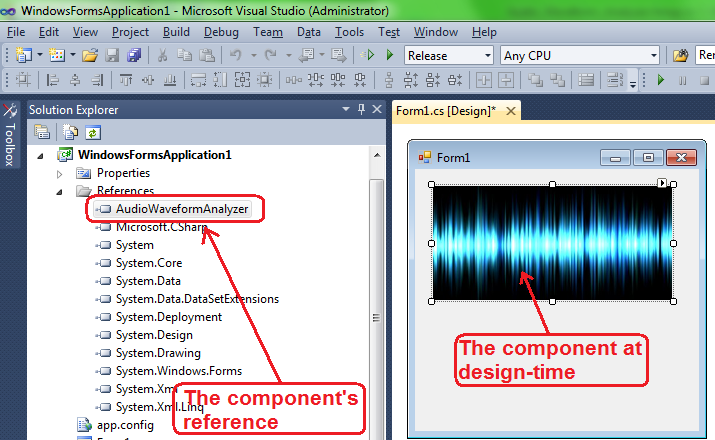
At this point, you can add the component to the form under editing by selecting the component's icon inside the toolbox and by dragging it into the form's surface as you would do for any other Winform component; after releasing the mouse button, one reference to the control will be automatically added to the "References" section of the Project and the inserted component will be displayed as seen on the screenshot below:
IMPORTANT NOTE ABOUT THE TARGETED .NET FRAMEWORK INSIDE VISUAL STUDIO 2010
When a new application is created from scratch through the Visual Studio 2010 wizard, by default the targeted .NET framework is set to ".NET framework 4 Client Profile": this version of the .NET framework is a subset of the .NET framework 4 and one of its main limitations is the fact that you cannot reference an assembly that is not in the ".NET Framework 4 Client Profile" so, in order to be able compiling the application referencing one of our components, assuming that the project name is "MyApp", you will have to perform following steps:
|
Editing control properties at Design-time
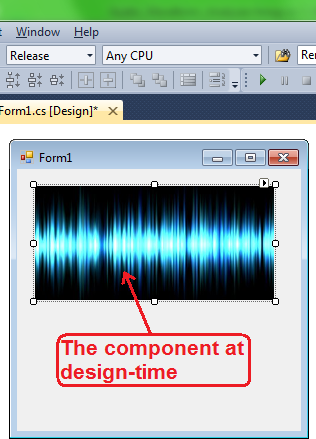
Once inserted, at design-time the control will appear in its default state.
Simply click the control under editing using the right mouse button and select the "Properties..." item located on the bottom of the appearing context menu as in the image below:
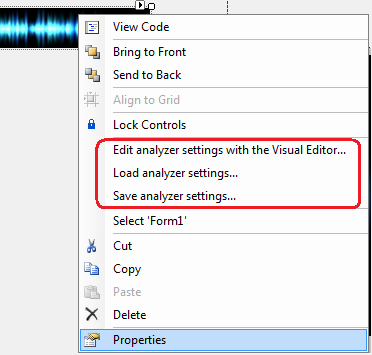
Menu item marked in red will give you the possibility to access settings of the control under editing:
| • | Edit settings of the waveform analyzer through the Waveform Analyzer Visual Editor application: see the "How to configure the waveform analyzer through the visual editor" tutorial for details about the usage of the visual editor. |
| • | Load settings of the waveform analyzer from a previously saved XML file |
| • | Save current settings of the waveform analyzer into a XML file for future use |
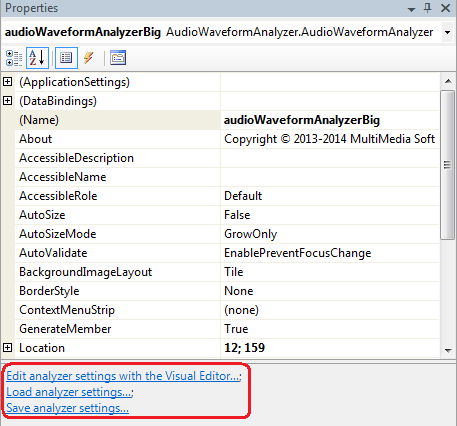
The same features pointed by menu items marked in red on the screenshot above can be accessed in other ways, for example by clicking on the "Properties" menu item that will display the component's property page
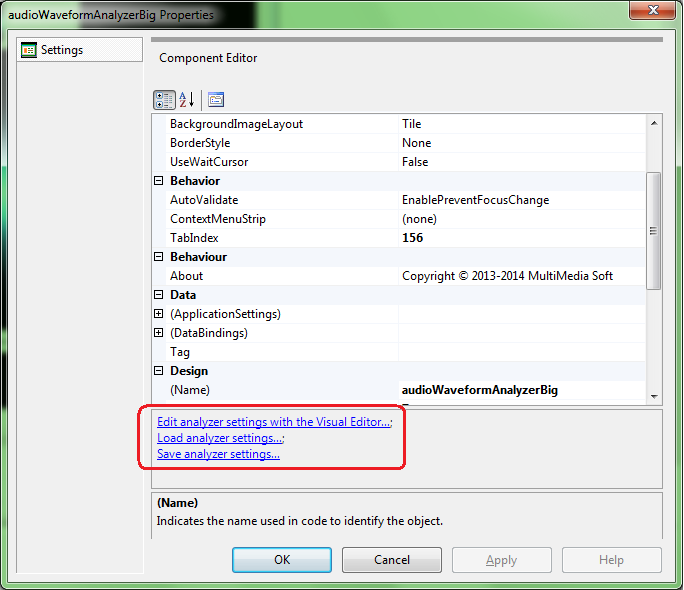
or through the "Properties" toolbox of the IDE:
Pressing the Edit analyzer settings with the Visual Editor... link will launch the Waveform Analyzer Visual Editor application that allows changing most of the waveform analyzer settings and check how it would behave during an eventual playback session:
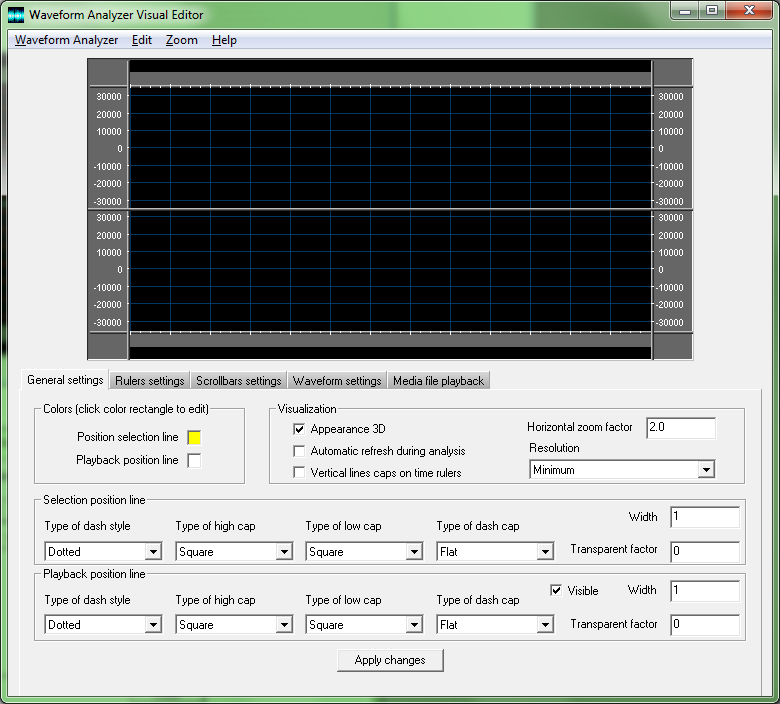
For details about the usage of the Waveform Analyzer Visual Editor application, see the "How to configure the waveform analyzer through the visual editor" tutorial.
Once the component has been added at design-time, you can start adding your own code around it: see the How to add code around the component tutorial for details.