|
Adding the API to a C# project (.NET Core 3.1 - .NET 5 and higher versions) |
  
|
|
Adding the API to a C# project (.NET Core 3.1 - .NET 5 and higher versions) |
  
|
After having installed the component inside the development PC through our setup program, you can add the component to a project targeting .NET 5, 6 and Core 3.1 versions by installing the proper NuGet package using the procedure described below:
| • | Open the project you are working on |
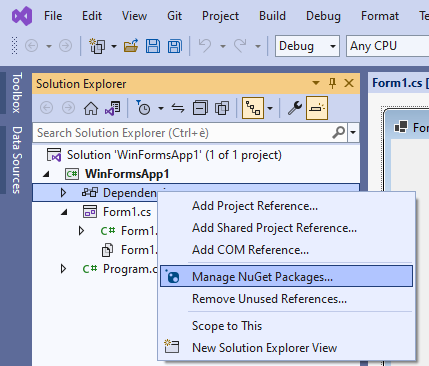
| • | Inside the "Solution Explorer" right-click the mouse button on the "Dependencies" item |
| • | From the context menu open the NuGet Package Manager by selecting the "Manage NuGet Packages ..." item |
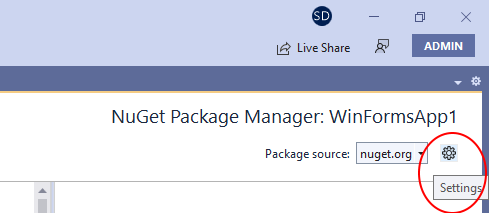
| • | By default the NuGet Package Manager will browse packages available on the nuget.org server; although trial versions of our NuGet packages are available inside nuget.org, it's recommended using packages available inside the folder in which you installed any of our components: the default folder is "\Program Files\MultiMedia Soft" so you need to set the mentioned folder as a packages source through the NuGet Package Manager settings |
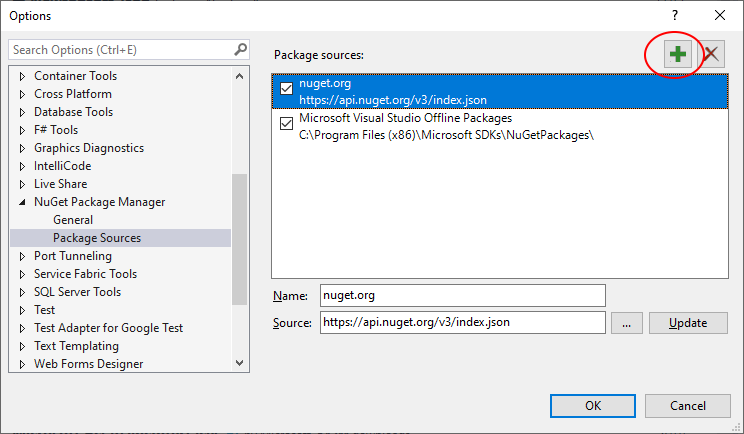
| • | On the settings form, select the "+" icon |
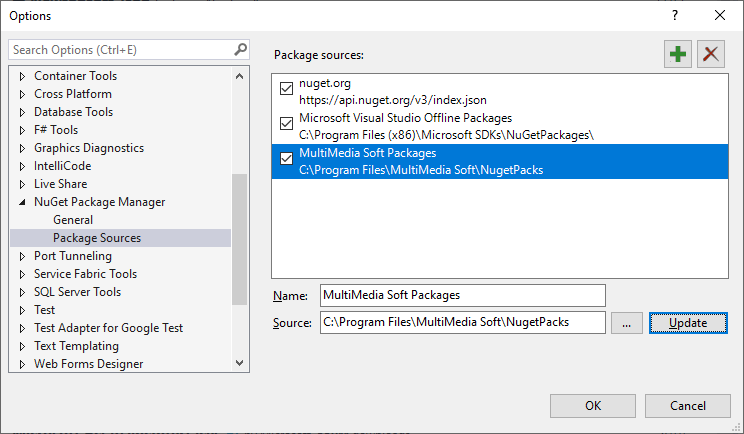
| • | A new default "Package source" is a automatically added as seen below |
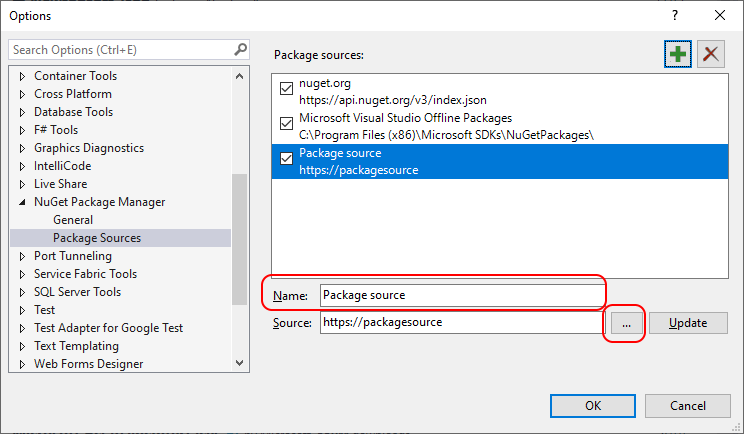
| • | On the "Name" field enter a string that would help identifying the source (we suggest entering "MultiMedia Soft Packages") |
| • | Click the "..." button and enter the path where our NuGet packages are installed (by default it should be "\Program Files\MultiMedia Soft\NugetPacks") |
| • | By clicking the "Update" button the form should finally look like this: |
| • | Close the form by pressing the "OK" button |
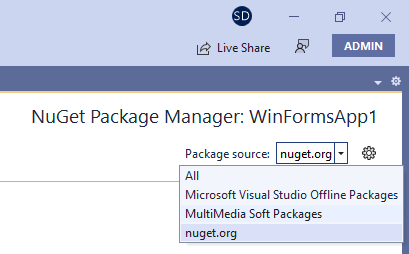
| • | The new source could now be selected through the provided combo-box |
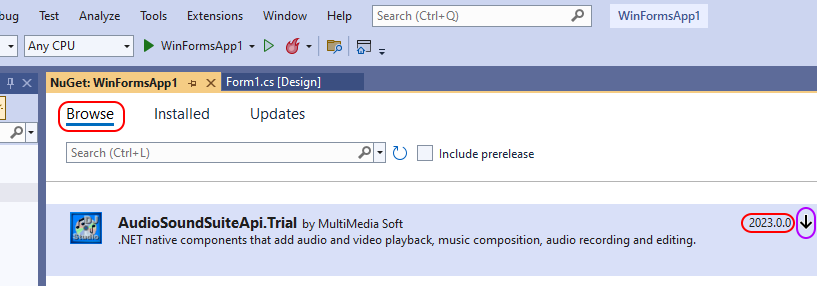
| • | Once selected, after clicking the "Browse" tab, all of the MultiMedia Soft NuGet packages installed on the development machine will be displayed (in this case a Trial version of the component) |
| • | In order to install the package inside the project, move the mouse of the right of the displayed version (circled in red below): this will cause an arrow to appear (circled in purple below): |

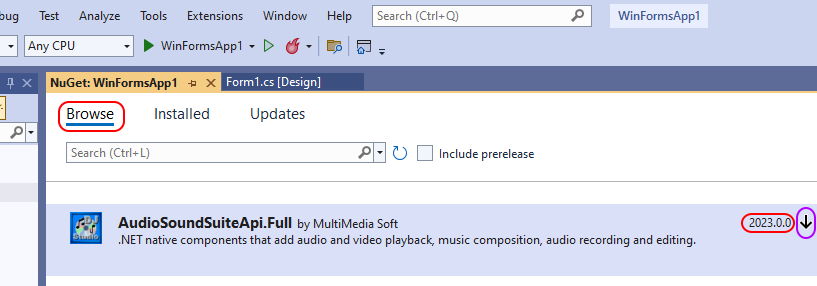
| • | The screenshot above is related to the usage of the stand alone Audio DJ Studio API for .NET setup package; In case you should have installed the complete "Audio Sound Suite API for .NET" setup program (which includes both the Audio Sound Recorder API and the Audio Sound Editor API components) the NuGet Package Manager would display the following: |
| • | Click the arrow in order to start the installation procedure |
| • | Once the installation procedure is completed, close the NuGet package manager |
| • | At this point the component is installed and you can start adding the needed code |
Once installed, we need to create a new instance of the class and, before starting sound playback management, to initialize it: for this purpose it's mandatory a call to the InitSoundSystem method. The code snippet below shows how to perform instancing and initialization of the component
Visual C# |
// instance the API as a global variable AudioDjStudioApi.AudioDjStudioApiObj m_audioAPI = new AudioDjStudioApi.AudioDjStudioApiObj();
// initialize the API at the beginning of your code m_audioAPI.InitSoundSystem (1, 0, 0, 0, 0);
|
You can now start developing your code around the API as described inside the How to use the API in your projects section
IMPORTANT: Before exiting the container application, in order to avoid memory leaks, it's recommended that you explicitly call the Dispose method of the API. Related to this recommendation, in case the instance of the API should be added to a secondary form that could be opened/closed various times, be sure to avoid declaring the instance as "static" or you may experience instabilities of the code.
|
The tutorial above is mostly related to the installation of the Trial version of the component; in case you should have already begun developing your application with the Trial version and at a certain extent you should decide to purchase the "Full" version, you would not have to restart your coding from scratch and you could simply upgrade using the appropriate NuGet package; below a simple sequence to perform this upgrade:
| • | Close any instance of Visual Studio |
| • | Uninstall the setup package of the Trial version from the "Apps" applet of the Windows settings |
| • | Download and install the Full version from our website using provided URL and credentials |
| • | Launch Visual Studio and open the project you were working on |
| • | Be sure to close the form containing the component |
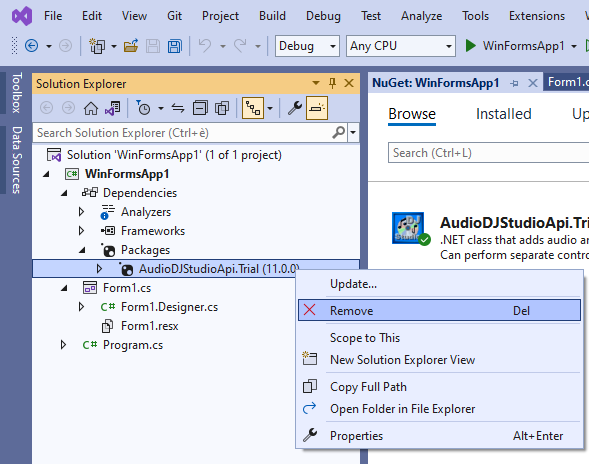
| • | Inside the "Solution Explorer" expand the "Dependencies/Packages" item |
| • | Right click the "AudioDjStudio.Trial" item and select the "Remove" menu item as seen below: |
| • | As explained above for the Trial version, open again the NuGet Package Manager and select the "MultiMedia Soft packages" source |
| • | Press the arrow for installing the Full version and finally close the NuGet Package Manager |
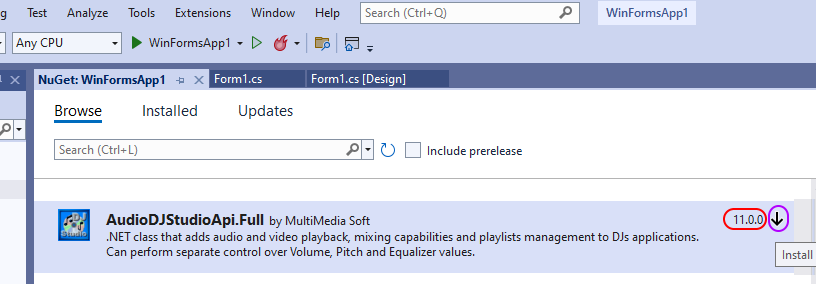
| • | The screenshot above is related to the usage of the stand alone Audio DJ Studio API for .NET setup package; In case you should have installed the complete "Audio Sound Suite API for .NET" setup program (which includes both the Audio Sound Recorder API and the Audio Sound Editor API components) the NuGet Package Manager would display the following: |
| • | The upgrade is now completed so you can go on with your development. |